
How to Use Reed Diffuser: A Complete Guide
Ever walked into a room and felt a magical scent? That’s the magic of reed diffusers. I’ve made my living spaces more inviting with these elegant solutions. Learning how to use reed diffusers can really change your home’s feel.
Reed diffusers are a popular choice for home fragrance, now preferred by 70% of people over candles. They offer a safe, easy way to add lovely scents to your space. No fire risks or complicated setup needed.
If you’re new to fragrances or want to enhance your home’s scent, this guide is for you. It covers everything about reed diffuser benefits and how to use them. Get ready to make your home smell amazing with ease.
Table of Contents
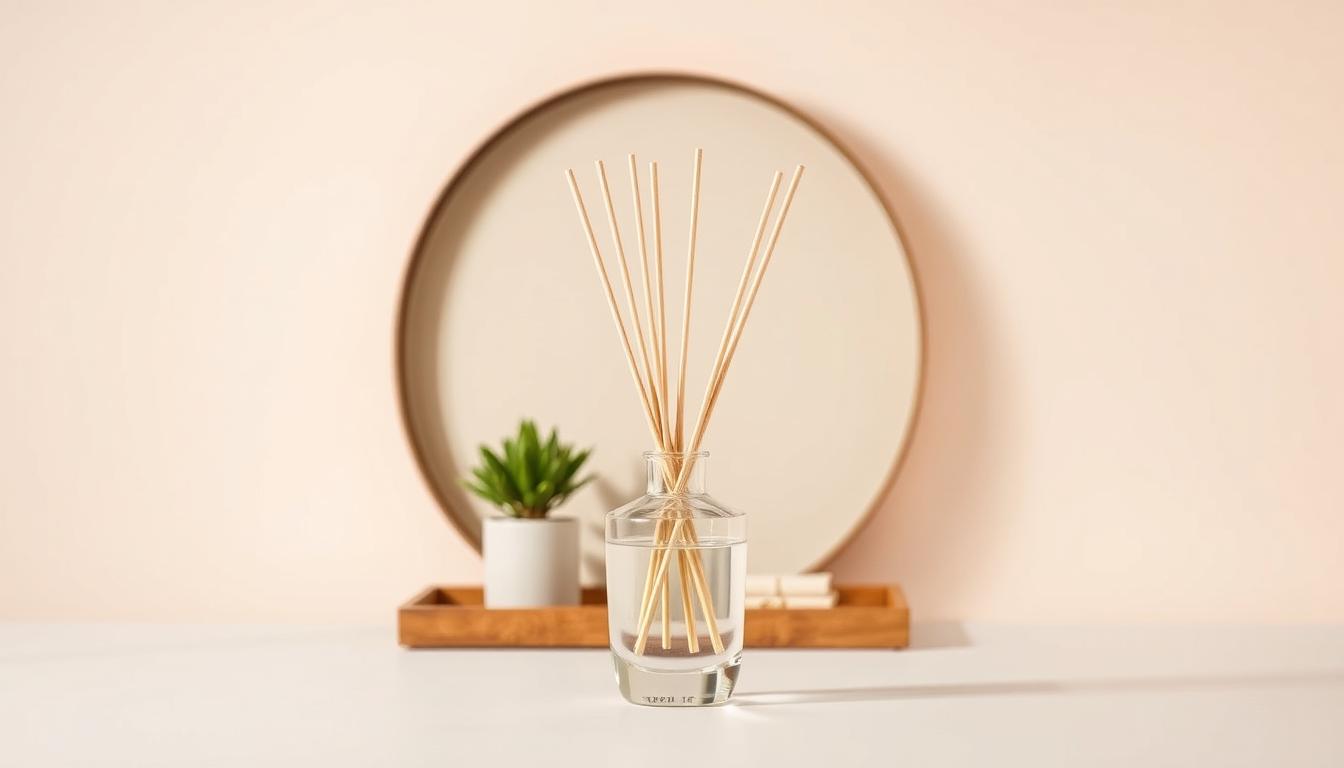
Understanding Reed Diffusers: Components and Benefits
Reed diffusers are a smart way to make your home smell good without the dangers of candles or air fresheners. They give a soft, lasting scent that changes your home’s feel.
Let’s dive into the world of reed diffuser ingredients. See how they create a wonderful smell experience.
Key Components of a Reed Diffuser
A reed diffuser has a few key parts:
- Glass or ceramic container
- Natural or synthetic fragrance oils
- Carrier base (usually alcohol or oil-based)
- Porous reed sticks
Advantages Over Other Fragrance Methods
Reed diffusers have some big advantages over candles:
| Feature | Reed Diffusers | Candles |
|---|---|---|
| Safety | No open flame | Fire risk present |
| Longevity | 1-2 months | Limited burning time |
| Maintenance | Low | Requires monitoring |
How Reed Diffusers Work
The science behind reed diffusers is pretty cool. Porous reed sticks soak up fragrance oil and spread it around. Using a 70:30 fragrance to carrier base mix helps the scent spread better.
Changing the number of reeds lets you control how strong the smell is. Usually, 5-8 reeds are best. Flipping the reeds often keeps the scent fresh and even in your space.
How to Use Reed Diffuser: Step-by-Step Instructions
Setting up a reed diffuser is easy and can change your home’s feel. To use it well, follow a few important steps. These steps help spread the scent and make it last longer.
First, take out your reed diffuser and pick the best place. Look for a spot with some air movement but no direct sunlight or heat. Before putting in the reeds, keep these tips in mind:
- Choose a location with moderate air movement
- Keep the diffuser away from direct heat or drafts
- Place on a stable, protected surface
Now, get your reed diffuser ready with these steps:
- Gently remove the bottle’s cap or seal
- Insert 5-8 high-quality reeds into the fragrance oil
- Allow reeds to absorb oil for 1-2 hours before initial flipping
- Flip reeds carefully every week to refresh the scent
“The key to a perfect reed diffuser is patience and proper maintenance” – Home Fragrance Experts
Experts say to keep your diffuser in top shape. Replace the reeds and oil every 1-2 months. This keeps the scent strong. Remember, using high-quality reeds can really improve your experience.
Follow these easy steps to make a diffuser that lasts 4-6 weeks. Reed diffusers are great for homes with kids or pets because they don’t have flames.
Choosing the Perfect Location for Your Diffuser
Choosing the right spot for your reed diffuser can make a big difference. It affects how well it works and how far the scent goes. The right place can make your space smell great, filling every corner with a lovely aroma.
The success of your reed diffuser depends on where you put it. Each room is different, and you need to find the best spot for it. This will help spread the scent and make your space welcoming.
Optimal Placement Tips
- Choose areas with good air circulation near fans or vents
- Position diffusers in high-traffic spaces for better fragrance spread
- Keep away from direct sunlight to prevent rapid oil evaporation
- Aim for locations with consistent room temperature
Areas to Avoid
Some places can hurt your reed diffuser’s performance. Avoid these spots:
- Direct sunlight exposure
- Drafty windows or air conditioning units
- Extremely humid spaces like bathrooms
- Areas with frequent temperature fluctuations
Room-Specific Placement Guidelines
Every room is different, and so is how you should place your reed diffuser:
- Bedrooms: Place on nightstands or dresser corners for subtle, calming scents
- Living Rooms: Position near seating areas or entertainment centers
- Home Offices: Set on desks or shelves for invigorating aromas
- Entryways: Create welcoming first impressions with strategically placed diffusers
Remember, a single reed diffuser is best for spaces under 200 square feet. If your room is bigger, you might need more diffusers to keep the scent even.
Selecting the Right Fragrance Oil

Choosing the perfect reed diffuser fragrance can make your living space feel like a sensory paradise. The fragrance you pick can change the whole feel of a room.
When looking at essential oils for reed diffusers, keep these points in mind:
- Scent intensity matching room size
- Personal mood and preference
- Seasonal appropriateness
- Quality of fragrance oil
Different scent families offer unique experiences. Citrus and oud oils are great for big spaces because they fill the air. Lighter floral scents are better for smaller, cozier areas.
“The right fragrance can completely transform your home’s ambiance.”
The concentration of your reed diffuser oil is very important. A good mix is 70:30, with 70% fragrance and 30% carrier base. This ensures a balanced and consistent scent.
Popular fragrance categories include:
- Woody and earthy tones
- Fresh citrus blends
- Delicate floral essences
- Warm oriental scents
High-quality essential oils for reed diffusers will give you a longer-lasting and truer scent. This will make your home feel even more special.
Reed Management and Maintenance
Keeping your reed diffuser in good shape is key for a constant scent. Learning how to care for it will make it last longer. This way, you can keep your home smelling great.
Selecting the Right Number of Reeds
The number of reeds affects how strong the scent is. Here’s a simple guide:
- Smaller rooms: 3-4 reeds
- Larger spaces: 6-8 reeds
- Stronger scent throw: Up to 10 reeds
When and How to Flip Reeds
Flipping your reeds regularly is part of the upkeep. Professional tip: Flip them every 1-2 weeks to keep the scent fresh. This keeps the fragrance even and stops the oil from getting too saturated.
Reed Replacement Schedule
Knowing when to swap out your reeds is important. Here are some tips:
- Replace reeds every 3-4 months
- Change them right away if they get dusty or change color
- Switch reeds when you change the fragrance oil
Pro tip: Always use high-quality, absorbent fiber reeds for best fragrance diffusion.
By sticking to these care tips, your reed diffuser will keep your home smelling wonderful.
Maximizing Scent Distribution and Longevity

Get the most out of your reed diffuser by placing it right and taking care of it. With the right tips, your home can smell amazing for a long time.
For the best scent, consider a few important things. Placing your diffuser near fans or vents helps spread the smell around your home.
- Position diffusers at room height for maximum scent throw
- Keep away from direct sunlight to prevent rapid oil evaporation
- Aim for areas with gentle air movement
Here are some advanced tips to make your diffuser even better:
- Use fewer reeds for subtle scent release
- Flip reeds every few days to refresh fragrance
- Replace reeds monthly to prevent oil clogging
Things like temperature, humidity, and air flow affect how long your diffuser lasts. High-quality essential oils give a richer and longer-lasting scent than fake ones.
| Fragrance Factor | Impact on Scent Distribution |
|---|---|
| Room Temperature | Higher temps increase evaporation rate |
| Number of Reeds | More reeds = stronger scent, faster oil depletion |
| Oil Quality | Premium oils provide longer-lasting fragrance |
By following these tips, you can enjoy a stronger and longer-lasting scent in your home. It will always smell great.
Common Mistakes to Avoid
Reed diffuser troubleshooting helps you get the most out of your home fragrance. Many people unknowingly make mistakes that hurt their diffuser’s performance. Knowing these common errors can help you enjoy a better and longer-lasting scent.
Using reed diffusers right is key. Here are the main mistakes to watch out for:
Improper Reed Handling
Reed diffuser tips stress the importance of handling your diffuser’s reeds right. Here are some key tips:
- Start with 4-5 reeds for the best scent
- Don’t use too many reeds, as it drains the oil fast
- Flip reeds every 1-2 weeks to keep the scent strong
- Replace reeds with each new oil refill to avoid clogs
Placement Errors
Where you place your diffuser matters a lot. Avoid these common mistakes:
- Keep diffusers away from direct sunlight
- Don’t place near heat sources like radiators
- Choose a spot with a moderate temperature
- Make sure it’s stable to avoid spills
Oil Management Issues
Managing your oil well is crucial for your diffuser. Here are some tips:
- Use high-quality, alcohol-free oils
- Clean the diffuser bottle before refilling
- Fill the bottle halfway to avoid spills
- Choose thick, specialized reed diffuser oils
- Quickly clean up any oil spills
By avoiding these common mistakes, you can make sure your reed diffuser keeps your space smelling great for a long time.
Troubleshooting Your Reed Diffuser

Reed diffuser troubleshooting helps keep your home smelling great. Knowing common problems lets your diffuser keep your space fragrant.
Weak scent throw is a common issue. If your diffuser’s smell isn’t strong, try these tips:
- Adjust the number of reeds (3-4 for smaller rooms, 8-10 for larger spaces)
- Flip reeds weekly to refresh fragrance circulation
- Inspect reed quality and replace if they appear saturated or clogged
Where you place your diffuser matters a lot. Avoid positioning your diffuser in direct sunlight or near heat sources. This can make the oil evaporate faster and weaken the scent.
| Issue | Solution |
|---|---|
| Weak Fragrance | Add more reeds or replace with fresh ones |
| Quick Oil Evaporation | Move to a cooler, less humid area |
| Clogged Reeds | Replace with new reed sticks |
Temperature and humidity affect your diffuser’s scent. Keep it in a cool, steady place for better smell. Oils like sandalwood, rose, and lavender give stronger scents.
Pro tip: Try placing your diffuser near a gentle breeze to spread the fragrance better.
Regular care and smart placement boost your diffuser’s scent. Use these tips to keep your home smelling wonderful.
Customizing Your Reed Diffuser Experience
Make your home smell amazing with personalized reed diffuser tips. Reed diffuser kits let you create unique scents that match your style and mood.
To create the perfect scent, do more than just put a diffuser out. Try these creative ways to enhance your scent experience:
- Experiment with layered fragrance combinations
- Match scents to seasonal themes
- Create custom oil blends
- Personalize diffuser vessel designs
Reed diffuser kits are great for those who love home fragrances. You can change how strong the scent is by adjusting the number of reeds:
| Reed Count | Fragrance Intensity |
|---|---|
| 3-4 reeds | Subtle, gentle aroma |
| 6-8 reeds | Strong, powerful scent |
Expert reed diffuser tips include smart placement and regular care. Turn your reeds every 1-2 weeks to keep the scent fresh. Don’t put your diffuser near sunlight or heat to stop the oil from evaporating too fast.
With careful customization, your reed diffuser is more than a scent tool. It’s a way to show off your home’s unique vibe.
Safety Considerations and Best Practices
When using reed diffuser tips, safety is key. Keep fragrance oils away from kids and pets. They can be harmful if swallowed. Store your diffuser kit high up, out of reach of curious hands or paws.
Think about allergies when picking essential oils. Some people might react to certain smells. Always choose 100% pure essential oils. Diffuse for 30-60 minutes at a time to avoid overdoing it.
Good air flow is important. Open the room for 1-2 hours after diffusing to keep air fresh. If you spill oil, clean it right away to avoid damage. Always cap the bottle when not in use to stop spills.
Regularly clean your diffuser to stop mold and bacteria. Some oils, like tea tree, citrus, and cinnamon, are bad for pets. Stay alert and follow the maker’s rules for a safe diffusing experience.